"KNOWLEDGE-BASED FITNESS"

Sunday, March 30, 2014

Total Knee Replacement Goals

Total Knee Replacement Goals


Following a Total Knee Replacement surgery, one of your long term goals is to regain full range of motion of your operative knee.  However, one of your immediate goals is to regain full knee extension range of motion.  Initially, knee extension is even more of a priority than knee flexion range of motion.  This is why you are repeatedly told not to place a pillow under your knee when you are lying down.  Most of my patients say they are very comfortable when lying in bed with a pillow under their knees.  But this is a "no-no."  The best you can do is place a pillow under your calf and ankle so that there is a space under the knee.  This will create gravity-assisted knee extension.  The absolute only time you can place a towel roll or pillow under your knee is if you are performing TKEs or Terminal Knee Extension exercises. 
 Here, you place a towel under your knee joint so that you can contract the quadriceps muscles which will fully extend your knee.  The last few degrees of knee extension (aka TKE) is the toughest to regain. 

Click Total Knee Replacement for the full Physical Therapy Video Protocol and follow along workout.


Thursday, March 27, 2014

Drive Through Your Hips

Drive Through Your Hips
 
Throwing a ball, swinging a club or a tennis racket and even punching an opponent revolve around rotational force of the hips as well as forces produced through the ground, rather than solely upper extremity strength.  The order of recruitment of power, particularly with heavy hitters is as follows: the swing is led first by the hips, then the trunk, arms, hands and finally the bat.  The more rotational velocity you can produce with your hips, the greater the force transmitted to the ball.  To improve this hip velocity and ground force, you should practice the movement pattern as well as practice the actual task (specificity of training).  If we learn how to create more force through the ground, this increased force will transmit through our bodies and into our target.  Check out the hip position and trailing foot in these pictures:


If we practice a technique that focuses on hip rotational velocity and explosiveness, we will throw further/faster, hit harder, punch with more force, etc...Here are some simple exercises that will help "groove" the hip rotation motor pattern:  Notice the trailing leg, how the foot pivots, the hip extends, and the 'snap' of the hip rotation/extension.  This creates the force that transmits through the trunk, into the upper extremities, directed toward the goal.  If you do not pivot on your trailing foot, you risk injuring your knee.
 
 
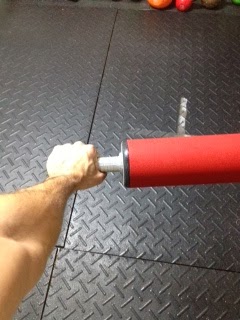
Here, I use a Persian Mil to help train the pivot, hip rotation, and trunk stability, as I thrust the Mil forward. This works the above discussed movement pattern as well as grip strength and shoulder stability.  To challenge the grip even more, I perform this technique using Neurogrips


 Now, I perform the same activity using a longer lever which makes control and stability even more difficult.  This further develops rotational hip velocity, trunk control and coordination of my lower extremities.
 
 
 You can try this out with a wooden dowel to smooth out the movement pattern, and progress to a weighted bar.


Sunday, March 23, 2014

Posture and Spinal Compression

Posture and Spinal Compression


Posture is one of the very first things I assess when working with a client, especially one who presents with lower back pain.  A majority of the clients who I treat for lower back pain require postural reeducation due to maintaining a slumped or flexed posture. 
 
Keeping this posture throughout the day results in tight anterior muscles, such as the pectoralis, and stretched out, weakened scapula retractor muscles (middle traps).  When we analyse this posture, we can see that the head is anterior, the shoulders are anterior and protracted and the lumbar spine is flexed.  This places an anterior weight distribution to our upper body.  What stops us from continuing to flex forward and eventually falling on our face?
 
The answer is our spinal extensors which run longitudinally up and down our spine.
These long extensors contract in order to limit any more flexion, thereby stopping us from completely flexing forward.  However, the constant engagement of these muscles actually compresses the vertebrae, creating more lower back pain!  You can feel these hardened muscles by palpating the lower back of your clients.  If the muscles on either side of the vertebral spinous process feels "hard as a rock," then you can assume these muscles are "on" all day, and this is part of the reason for their lower back pain.  Keep your hand on these muscles and ask your client to contract their glutes ("clench"), retract their shoulders and tuck their chin.  Now see if these muscles "soften" to your touch.  By relaxing these muscles, you are reducing the amount of spinal compression and eventually the pain will diminish. 
Now certain activities require you to flex forward, such as shaving.  Many of my clients complain of increased lower back pain when shaving or doing the dishes.

  With this, I spend time educating them in performing a hip hinge and a lunge position rather then flexing forward from the spine.  This usually helps immediately.  Others will ask me if they should purchase a posture brace.  I am not a big supporter of these braces, as they do the work for you.  You rely on an external support device to maintain your posture rather than your own muscles.  Therefore, the muscles that need to be strengthened and those that need to be stretched are not really getting what they need, and the person wearing the brace never develops the body awareness to maintain proper posture.  Although not much substantial evidence exists regarding kinesiotape, I find that it does provide the proprioceptive input that "tells" you to maintain the neutral spinal posture rather than the slumped position.  In my experience, upon applying kinesiotape, these lumbar muscles relax and the pain diminishes.

 So first, assess your client's posture.  Second, palpate the longitudinal spinal extensor muscles on either side of the vertebrae.  Third, have your client squeeze their glutes, retract their shoulders and perform a chin tuck.  Assess what the muscles feel like now.  Teaching your client to maintain this posture will be one of your client's main goals during everyday life as well as during resistance training.  For more information on posture and body mechanics, check out the DVD at: www.lowbackpainvideos.com


Wednesday, March 19, 2014

Clients With Lower Back Pain

Clients With Lower Back Pain

Many times you may begin training a client who states he/she has a history of lower back pain.  An XRay or MRI may not have been performed due to your client's hesitation to see a doctor or having poor insurance.  As a professional, you can hypothesize what the possible diagnosis is by asking a few questions:

1) What is the age of your client?  From the teens to the fifties, disc issues are most common, such as bulging or herniated discs.  After the fifties, arthritis and spinal stenosis is most common.  The symptoms of these diagnoses will present differently

2) Can your client remember a specific incident that brought on the pain?  When was it? This will tell you if it is due to a trauma and if it is chronic or acute

3) What positions or activities increase or relieve the pain?  Many times, someone with a bulging disc or herniated disc feels better standing and walking, while stenosis feels better with sitting and bending.  Use this information to help devise appropriate activities

4) What is a typical day like? Does your client have a desk job or a job that requires repetitive bending, lifting and twisting?    Many times people who repetitively bend, lift and twist will fatigue.  Motor control errors result and injury can occur, specifically disc issues

5) Describe the pain.  Does it radiate down the inside or outside of the leg and knee? Does it pass the knee and reach the foot?  Radiating pain may mean a disc is irritating a nerve root or that a bone spur is placing pressure on the nerve.

The above questions will help guide your treatment/training sessions so that it is customized for your client's specific needs.  For more training information regarding clients with herniated/bulging discs or spinal stenosis, go to: www.lowbackpainvideos.com.  The DVDs here provide step by step exercise protocols for these common back conditions.

Sunday, March 16, 2014

Dynamic Flexibility Activities As A Warm Up

Dynamic Flexibility Activities As A Warm Up
 
 
Viscosity is a property of biological tissues, in this case the spine and torso muscles, and it is defined as a resistance to motion.  Viscosisty of these tissues can be reduced to allow subsequent motion of the spine and torso with less stress on the tissues.  To do this, incorporate gentle motion activities (not static stretches) as part of your warm up.  It is suggested that this warm up include spinal stabilization exercises using functional movement patterns, such as diagonal chops and lifts. 

You will also want to keep in mind that the spine does have a "memory."  A prior activity can effect the spine's biomechanics during the next activity.  For example, if you are in the seated posture for a period of time, the spinal ligaments become lax and posterior disc creep may result.  This may lead to injuries such as bulging disc. 
Notice the flexion in the lower back
 Upon positional change, the nucleus of the spinal disc redistributes (no longer creeps).  Therefore, it is a good habit to alter your positions from one exercise to the next.  Follow an exercise that consists of spinal flexion with an exercise where the spine is either in neutral or extended.  This will minimize the chances of disc creep, bulging discs or even herniated discs.     
Follow the seated row exercise above with the plank hip extension exercise, moving from a flexed posture exercise to an neutral/extension exercise

Wednesday, March 12, 2014

More on Forearm and Wrist Strength: Pronation and Supination

More on Forearm and Wrist Strength:
Pronation and Supination
 
 
In previous posts I spoke about forearm, wrist and hand grip strengthening in the direction of elbow flexion (Bottoms Up Bicep Curl), wrist flexion and extension, and wrist radial and ulnar deviation both dynamically and statically with the focus on maintaining wrist stability while a resistance is applied at a certain direction.  Today I will discuss training forearm pronation and supination. 
 This photo is of my hand, wrist and forearm in the neutral position holding a dumbbell
 This photo is of my hand moving into the pronated position

 This is a photo of my hand in the supinated position
 
Moving from neutral to pronation and back to neutral holding the weight in this manner is training the supinators
 
        
Moving the weight from neutral to the supinated position and back to neutral is training the pronators 

 To make the above exercises more challenging, just increase the length of the lever you are trying to move (Here I use a Persian Mil) - Neutral Position

Pronated Position
 
 
Supinated Position
 
To add even more of a challenge, add thickness to the handle using Neurogrips.  This will challenge your grip as well as your forearm strength

Neutral Position Using Neurogrips


Pronated Position Using Neurogrips
 
Supinated Position Using Neurogrips

 And now to challenge your grip and forearm muscle endurance... Maintain a static position of your hand, wrist and forearm while a pronation or supination force is applied:
 Here, the Persian Mil apply a force in the direction of forearm supination and in order to prevent any motion, the pronators must contract isometrically while I perform kneeling rear delt lifts

Here, the Persian Mil apply a force in the direction of forearm pronation and in order to prevent any motion, the supinators must contract isometrically while I perform kneeling rear delt lifts
 
Try the above progressions to further improve your grip strength


Sunday, March 9, 2014

Blackout!!!

Blacking Out With Heavy Lifts
 

Many of you may have seen this video before: BLACKOUT!!!
This is pretty common with heavy lifts and max exertions.  Why did he blackout? 
Upon intense exertions, your blood pressure in the cranial vessels rises to extreme levels.  This causes a large pressure gradient between the vessels of the brain and the Central Nervous System/Cerebral Spinal Fluid (CSF) pressure that is in the spine and surrounding the brain.  If the gradient is large enough, you may black out.  To reduce this pressure gradient, you will want to increase the pressure of the Central Nervous System.  In order to accomplish this, the Valsalva Technique may be used.  The Valsalva Technique is basically holding your breath, which along with abdominal bracing, not only increases the CNS pressure, but also increases intra-abdominal pressure, further stabilizing your spine for the heavy lift.  The Valsalva Technique is not recommended for rehabilitation clients due to the possibility of other medical conditions, as it has the possibility of leading to aneurysms or stroke.  However, for athletes performing these extraordinary lifts, the statistics of the Valsalva causing stroke or death are very low.  The Valsalva Technique increases the CNS fluid pressure, decreasing the pressure gradient between the cranial nerves and the CNS, which then reduces the load on the blood vessels.   Performed properly, this will help prevent blackouts.  However, sometimes it just is not enough.
Wednesday, March 5, 2014

Spine CPM Unit

Spinal CPM
 
Following a Total Knee Replacement, many surgeons will immediately place their patient's leg into a CPM or Continuous Passive Motion Unit in order to 'get the knee moving' so that functional range of motion may be reached as soon as possible.  Some surgeons are advocates of the CPM, while others avoid it.  As it is very common to see a knee or even a shoulder CPM unit, for me years ago it was not so common to see a Spine CPM unit.  However, the clinic I had worked for purchased one for more than $50,000 and used it for many of the patients suffering from lower back pain.  I initially used it but did not notice much of an improvement in my patients' progress.  Many of them actually felt worse.  As I studied more about treating lower back pain, I learned that although many of these patients have limited trunk range of motion, my goal should be to stabilize and strengthen their spine in the neutral position, while maximizing hip and knee mobility, rather than attempting to maximize their spinal flexibility.  Once the patient has progressed through stabilization and into endurance and strength training, then trunk flexibility may be focused on.  However, this is not the main focus and many studies even show that increasing spinal flexibility does not predict whether a patient will or will not have recurring back trouble.  My take home message is that for clients suffering from lower back pain, I must first work on trunk stabilization in the neutral position, and not be so concerned about their spinal flexibility. 
 
Check out this video on the Spine Six Biomotion Unit and let me know if you have had successful or unsuccessful experiences with it: Spine Six Biomotion.  You may also recognize the picture below, which is similar in concept, but was being sold to households.

Monday, March 3, 2014

Side Plank Reverse Pyramid

Side Plank Reverse Pyramid
 
To build endurance of the trunk muscles in order to maintain stability for long periods of time, your focus should not be to fatigue the muscles over extended work times, but to allow short rest periods in order for the muscle oxygen levels to be restored.  One popular trunk stability exercise is the Side Plank.
Many times I see people holding the Side Plank for 30-60 seconds until their entire body is shaking and their form deteriorates.  Instead, hold each plank repetition for 5-7 seconds and then rest for a few seconds.  Then repeat.  You can use the Reverse Pyramid Russian Method, starting with 5 repetitions on the right side, then 5 on the left, then rest.  Then do 4 on each side, followed by rest, and then 3 on each side.  As you go through the pyramid, you are more likely to maintain proper form because although you are fatiguing the muscles, the reps are decreasing so you are not training to failure.